What's Really Under Your Floors — And Why It Can Wreck an Entire Installation
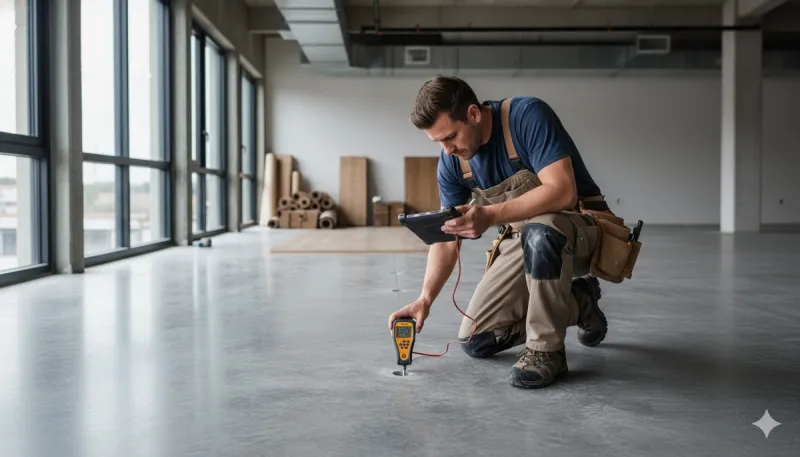
Photo: subfloor moisture testing inspection before flooring installation, via www.builddirect.com
There's a version of a flooring project that goes perfectly. The crew shows up, the product looks great, the installation is clean, and three years later everything still looks exactly the same. That's the version everybody's hoping for.
Then there's the other version. The one where the new floors start buckling six months after installation. Where the LVP is lifting near the bathroom. Where there's a soft spot developing in the middle of the hallway that definitely wasn't there before. That version happens more than most contractors will admit — and the reason almost always traces back to what was happening beneath the surface before the first board ever went down.
If you own a home in Pelham, especially one built before 1990, this article is worth reading before you sign any installation contract.
The Part of the Project Nobody Wants to Talk About
Here's an uncomfortable truth about the flooring industry: subfloor preparation is unglamorous, time-consuming, and often invisible in the finished product. Which means it's also the first thing to disappear when someone is trying to put together the lowest possible estimate.
A crew that skips proper subfloor inspection and prep can move faster, quote cheaper, and win more jobs. The problems don't show up immediately — they develop over months or years, by which point the contractor is long gone and the warranty conversation gets complicated fast.
This isn't a knock on every budget installer. But it is a real pattern, and homeowners deserve to understand what proper pre-installation work actually looks like — so they can tell the difference between a thorough contractor and one who's cutting corners they'll never see.
Why Pelham Homes Are Particularly Vulnerable
Older homes in the Northeast come with a specific set of structural characteristics that make subfloor issues more likely than in newer construction.
First, there's age. Homes built in the mid-20th century were constructed with materials and techniques that are now decades past their designed lifespan. Subfloor panels can degrade, joists can shift, and the whole substrate system can develop a subtle unevenness that's invisible to the eye but measurable with the right tools.
Second, there's moisture. Pelham's climate — with genuine winters, humid summers, and the kind of freeze-thaw cycles that are hard on any structure — creates ongoing conditions for moisture infiltration. Crawl spaces and basements in older homes frequently have inadequate vapor barriers, or none at all. That moisture migrates upward into subfloor materials over time, and it doesn't announce itself until something installed on top of it starts to fail.
Third, there's the history of the house. Most older homes have had multiple flooring installations over the years. Each one may have introduced adhesives, fasteners, leveling compounds, or modifications that affect what the subfloor looks like today. Without a thorough inspection, you're essentially installing over a history you don't fully understand.
What Moisture Actually Does to a Floor
Let's get specific about the failure modes, because they're not always intuitive.
Hardwood and engineered wood are particularly sensitive to moisture content. Wood expands when it absorbs moisture and contracts when it dries out. If the subfloor has elevated moisture levels and the flooring isn't properly acclimated or a vapor barrier isn't installed, the wood will expand after installation and have nowhere to go. The result is cupping, buckling, or gaps — all of which look like installation errors but are actually substrate problems.
Luxury vinyl plank is often marketed as waterproof, and the planks themselves largely are. But "waterproof flooring" doesn't mean the installation is immune to moisture problems. If the subfloor has high moisture content and the adhesive or underlayment system isn't designed to handle it, you can still get adhesion failures, lifting edges, and soft spots. The floor doesn't rot, but it does fail.
Tile and stone installations on a subfloor with flex or movement will crack — not immediately, but inevitably. Grout lines go first, then tiles. It looks like a product failure or a grouting error, but the real cause is a substrate that wasn't rigid enough to support the installation in the first place.
What a Real Pre-Installation Inspection Actually Covers
A thorough contractor doesn't just show up and start pulling up old flooring. Before any product gets ordered or installed, there's a legitimate assessment process that should happen. Here's what it looks like:
Moisture testing. This isn't optional — it's fundamental. A moisture meter reading of the subfloor tells you whether you're dealing with elevated levels that need to be addressed before installation. In many older Pelham homes, this step reveals problems that weren't visible or suspected. The fix might be a vapor barrier, better crawl space ventilation, or in some cases addressing a drainage issue outside the house. None of those are quick, but all of them are cheaper than replacing a failed floor.
Flatness and levelness assessment. Most flooring manufacturers specify acceptable tolerances for subfloor flatness — typically something like 3/16 of an inch over a 10-foot span. Floors that exceed that tolerance need to be flattened with leveling compound before installation. Skipping this step leads to hollow spots, movement, and stress fractures in the finished floor.
Structural integrity check. Walking the subfloor, checking for soft spots, squeaks, and areas with flex. Identifying any sections that need to be reinforced or replaced before new flooring goes down. This is especially important in areas near plumbing fixtures, where water damage may have compromised the substrate over years of minor leaks.
Existing material assessment. Understanding what's already there — old adhesive, previous underlayment, leveling compound from a prior installation — and determining whether it needs to be removed or can be installed over.
The Low-Bid Problem
We'll be direct about something: if you've gotten multiple quotes for a flooring project and one is significantly lower than the others, it's worth asking specifically what the estimate includes in terms of subfloor preparation.
A lot of low bids assume a perfect subfloor. They don't include moisture testing, leveling, or any remediation work. When problems are discovered mid-project — and they often are — the homeowner suddenly faces change orders that weren't in the original number. Sometimes those change orders are legitimate. But sometimes the contractor knew the subfloor needed work and chose not to include it in the bid to win the job.
The better approach is to ask upfront: what happens if moisture levels are elevated? What's included if the subfloor needs leveling? What's your process for handling surprises? A contractor who has clear, specific answers to those questions is one who's actually thought through the project.
What This Looks Like at Flooring Pelham
When we do an in-home consultation, subfloor assessment is part of the conversation from the beginning. We're not trying to manufacture problems — we're trying to make sure that what we install holds up the way it should.
For Pelham homeowners with older homes especially, that means taking the time to understand what's under the surface before we ever talk about product selection. It's not the exciting part of a flooring project. But it's the part that determines whether the exciting part — the beautiful finished floor — actually lasts.
If you're planning a flooring project and you haven't had anyone look at your subfloor yet, that's the first conversation to have. Not the last.